Finally I am able to make it work on the ESC and flashed INAV into it. Testing out the functionality and the thrust power. The good news: IS WORKING! I am going to solder the rest of the components and make it fly…. Stay tune….
Category: ESC
All-in-One FC – BertFC Version 1.0
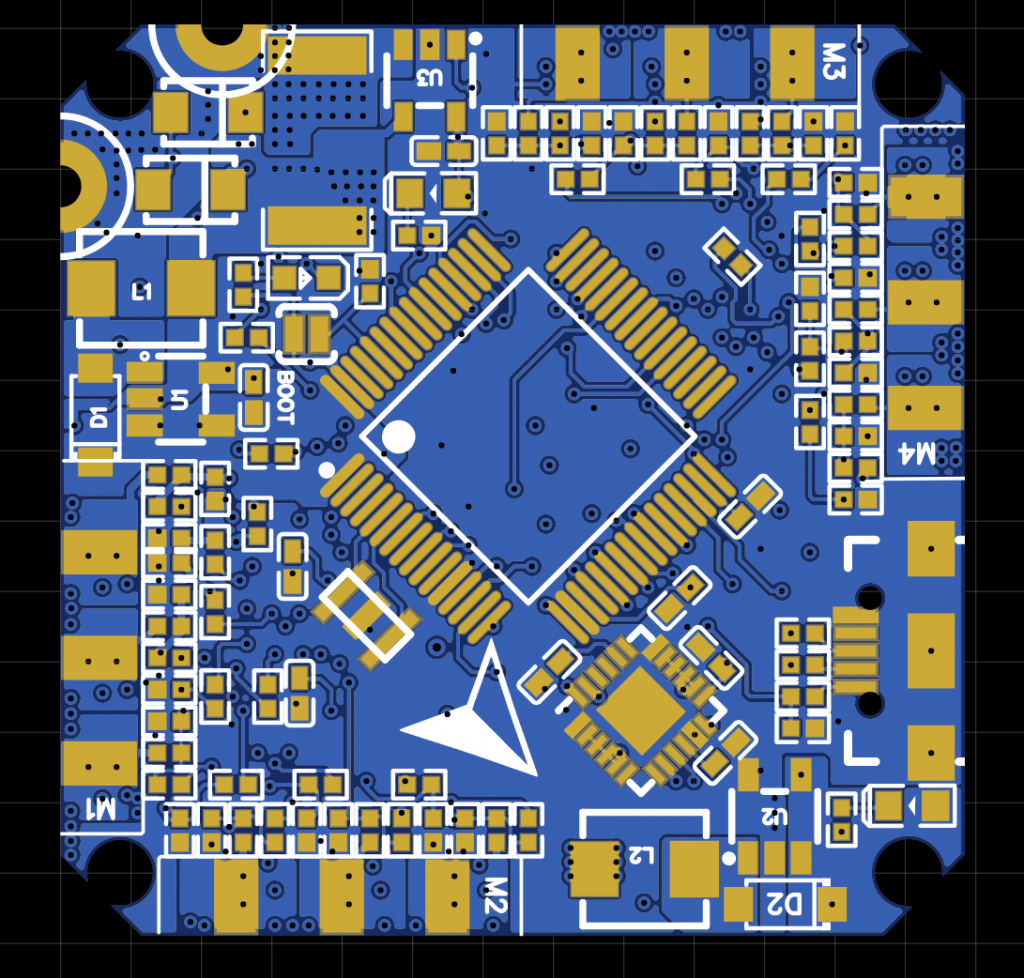
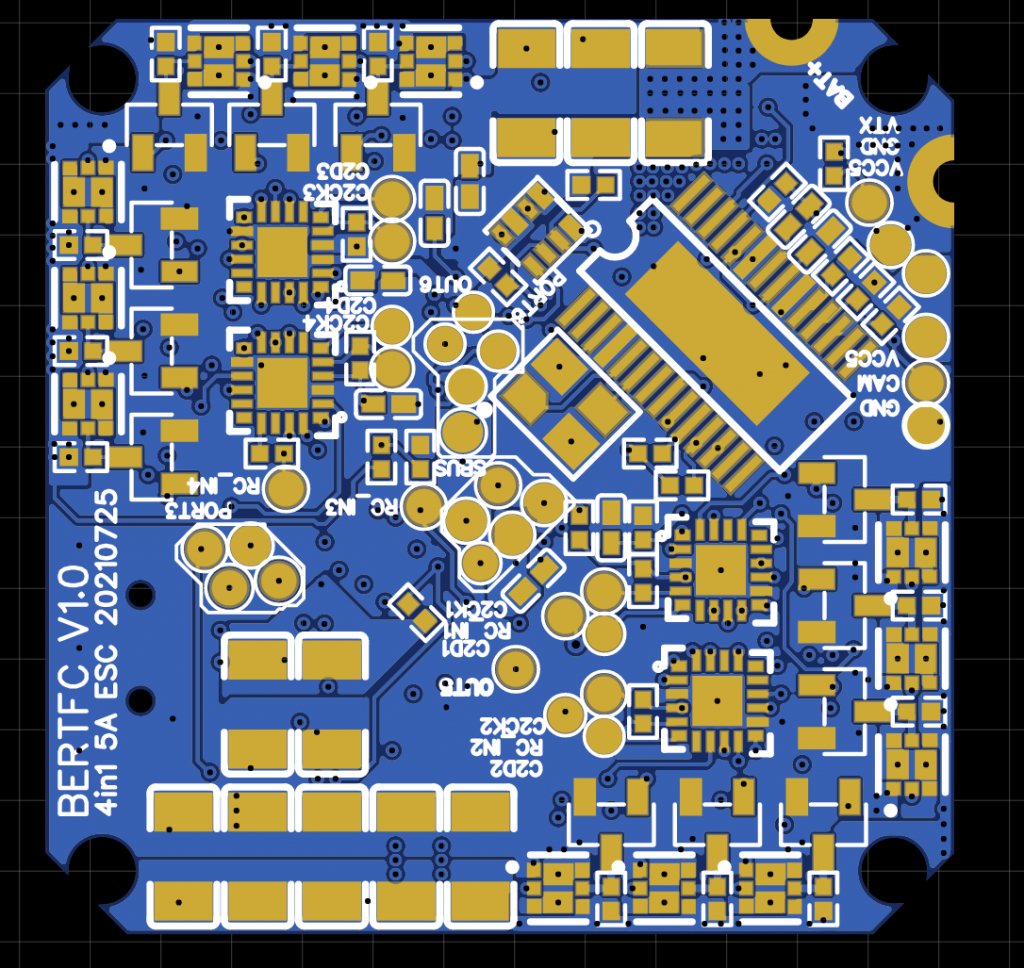
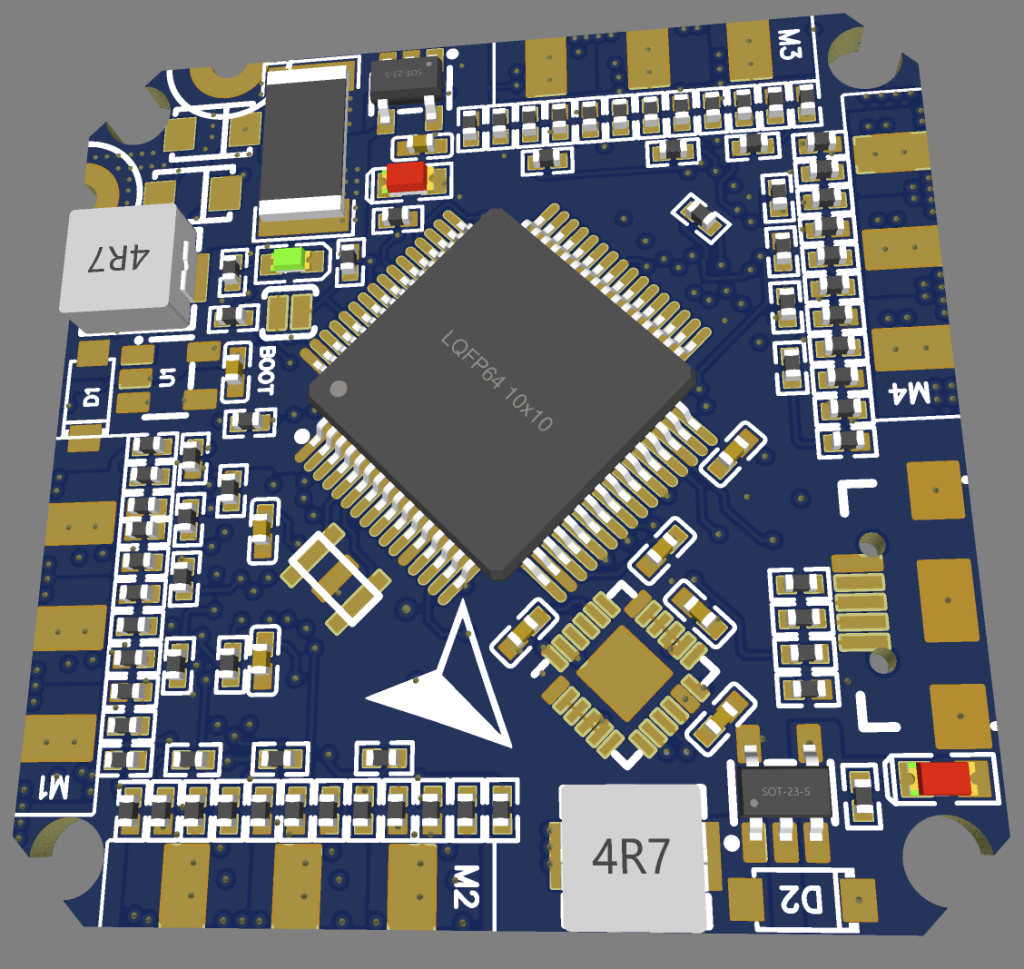
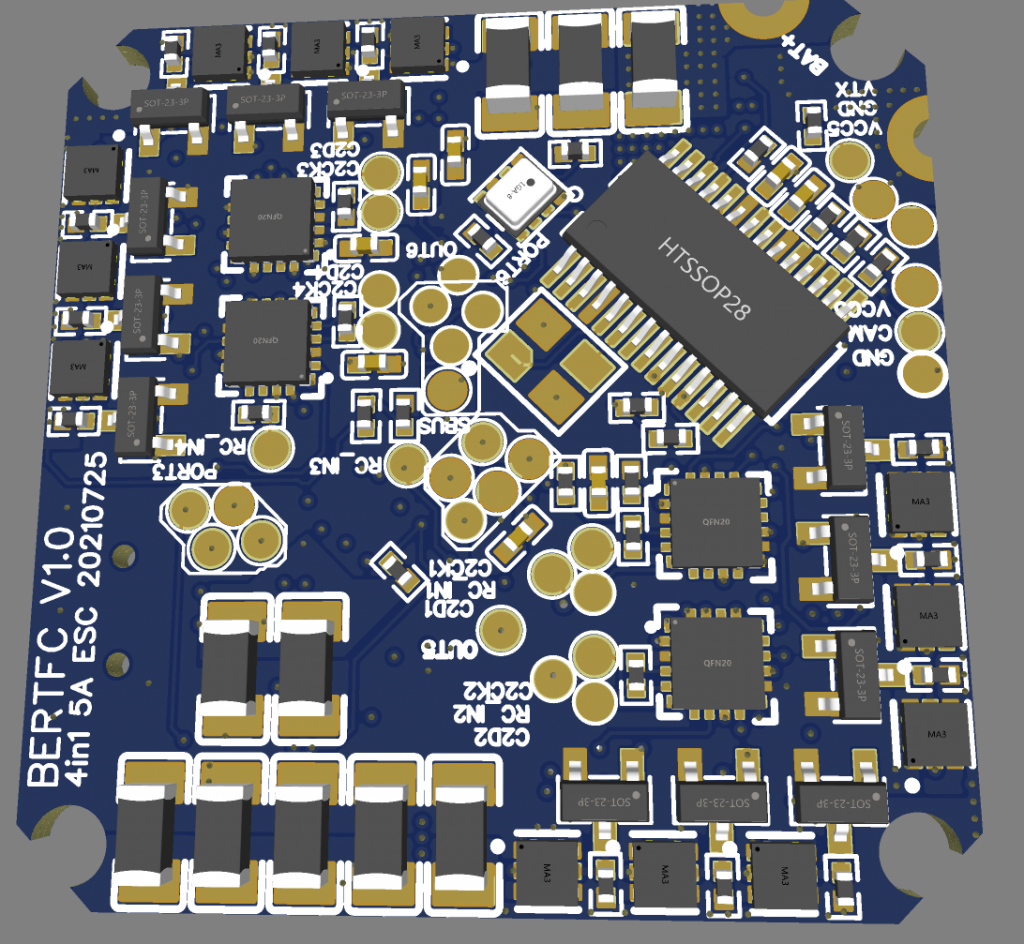
Finally have the full confidence that this version will be working well. As I am using the previous design as RnD and finalized the ESC is working and also corrected a few mistakes that I had done on the previous version. This coming version will be having:
– 4-in-1 ESC with 5A on each channel (Good enough for a small 3-inch quads)
– DSHOT600 is supported
– BLHeli_S or BlueJay firmware are supported
– STM32F405RTG6 as the heart of the Flight Controller
– With a few serial ports for GPS
– OnBoard OSD
– SBUS protocol
– Baro onboard
– MPU6000 Gyro
– Current Sensor
– 3.3V buckbooster for all the ESCs, STM32 and etc
– 5V buckbooster for VTX, Cam and GPS
– Theoretically should be able to run from 2.0v ~ 4.2v. Yes, only 1S battery
– 32.5 x 32.5mm
Why I build these?
The reason building this is to understand how the whole quad system works. This let me dive deep into every aspect. I learned about ESC, ESC firmwares and also understanding how the ESC MOSFET works. The interesting part of this FC is low power. Normally FC using the cheaper version of the buck converter. I am trying to use a decent powerful buckbooster converter and hopefully this will let me to fly my quad for more than 20 minutes on single cell. All these ideas came from DaveC FPV which he had built a very nice Nano Long Range Quad running on 1S. This is the video -> https://www.youtube.com/watch?v=LDJBj7hRqW0. I would like to buy those FC but I just want to have something that I am able to build and opensource the schematic to everyone and build one for yourself. Once I am done, I will start to share out the schematic. Just need to make sure is working before sharing out.
Also, with this will let me keep on building more and more quads.
Below are the images of the board. Yeah, I just sent for fabrication and dont have the real thing yet. So stay tune, I will build and update again over here.
How To Flash BLHeli_S Firmware To EFM8BB21F16G
During the first time when I got my 1st ESC set up, I was stucked for a while and having a question in my head, ” How do I flash in the firmware?”. I am a pure Linux user. I don’t use Windows systems. Well, thanks to Google and I am able to find out a few ways. Somehow ended had to use the Windows Application and get the work done. In future, I will try to convert it to Linux when I have the time.
First get an Arduino Nano as the Interface module between BLHeliSuite and the Custom ESC. You will need to flash it with the provided HEX to the Arduino Nano.
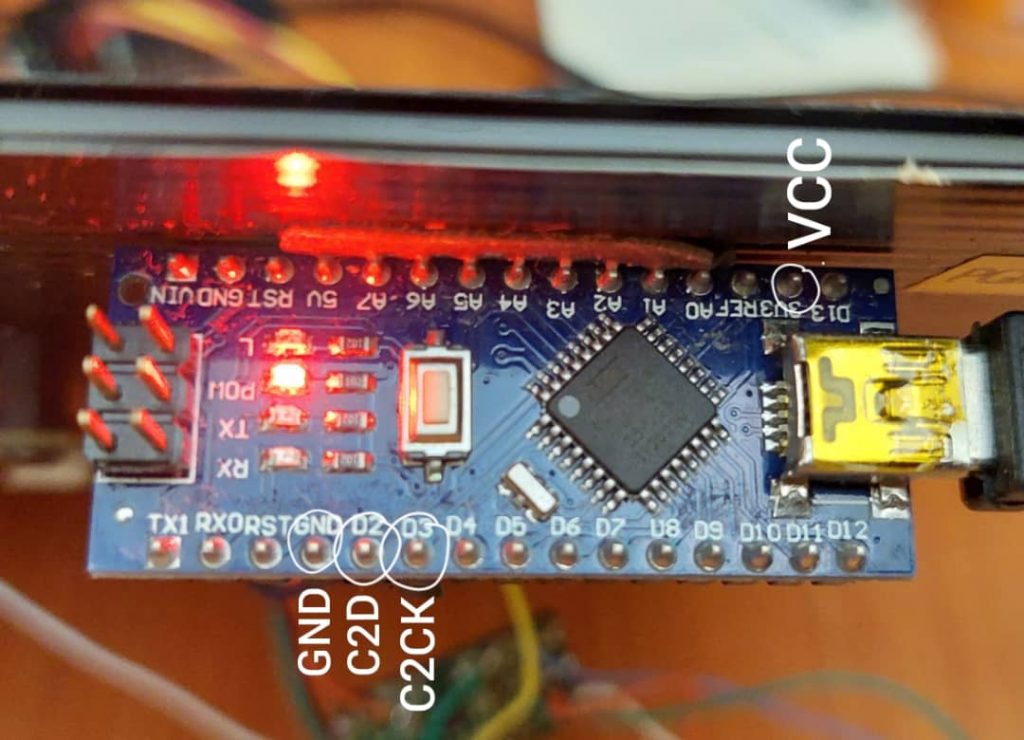
The above image indicates the PINS to be connected to the Custom ESC for the 1st initial firmware loading. Load up the BLHeliSuite and select the serial port that is connected to the machine also select the Arduino 4way-interface
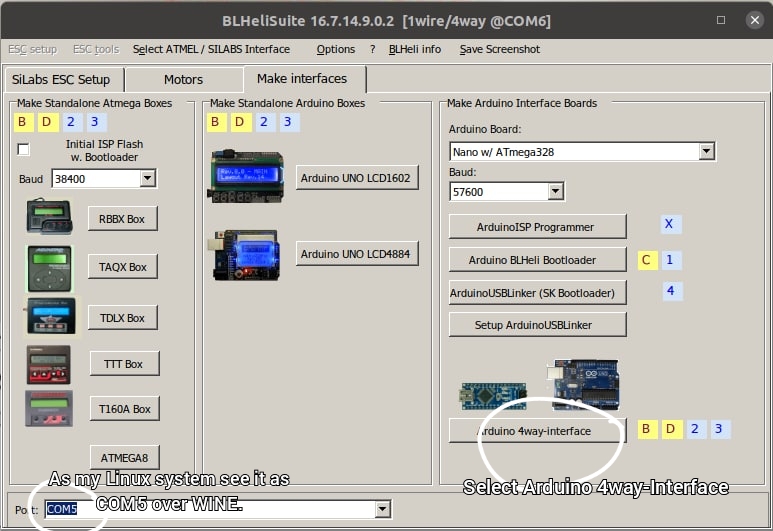
Next load up the Choose firmware dialog box.

Select the 4wArduino_Nano__16_PD3PD2v20005.hex and click Open then flash the firmware into the Arduino Nano. This you will have the Arduino Nano to be the Interface medium between the BLHeliSuite and the Custom ESC.
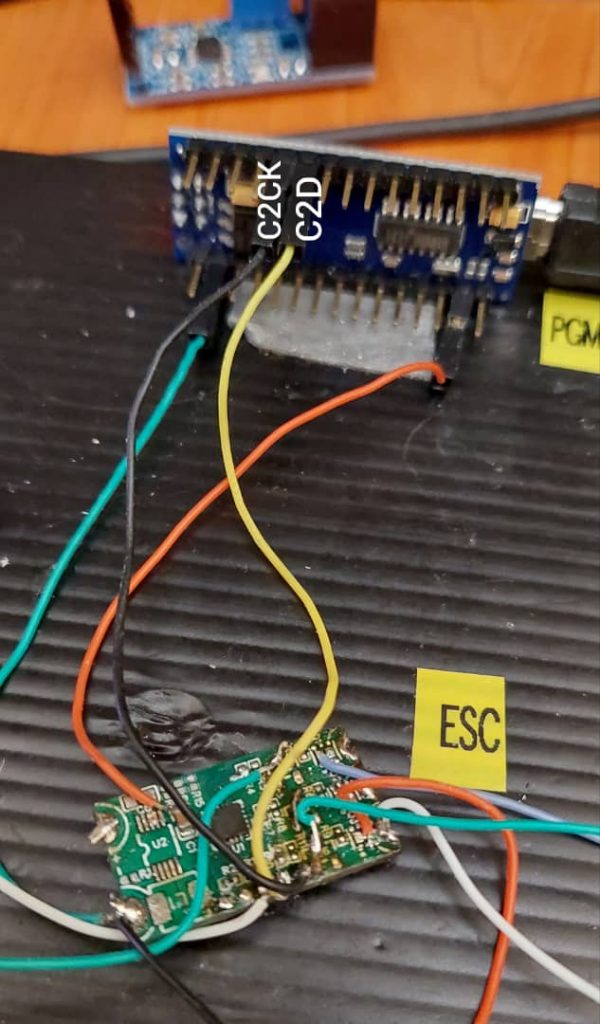
Below is the image on how to connect the wires to the custom ESC from the Arduino interface:
To load the initial firmware, you will need to pick the SILABS CS(4way-if) under the SELECT ATMEL/SILABS interface menu.
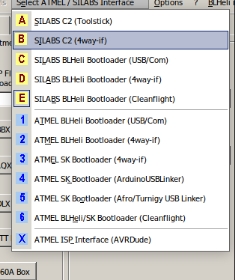
Select the right COM port and start to click on the CONNECT button and follow by the “Read Setup” button. If everything working, you will see something similar as below image.
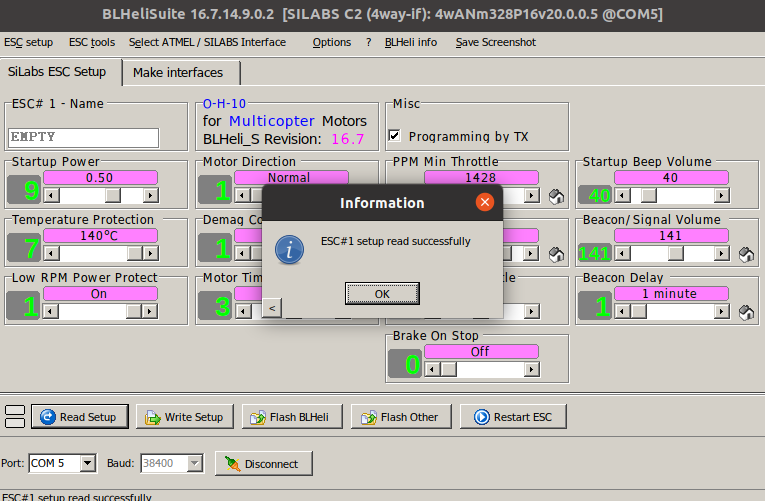
From here, you can start to load up different firmware to experiment with the custom firmware to the custom ESC. Bear in mind, you may get smokes out of the MOSFETs. You will need to limit the current and voltage do to the settings and testings.
You can even swap the pins in the code and compile into HEX and upload to the ESC using this BLHELISuite. Of course, once this first initial version flashed in, you can start to use your FlightController to do a pass-thru for the firmware upgrades, settings and everything. I was testing on INAV 3.0 and it works great! Hope these will help some new comers whom wish to build and flash their own first firmware into a blank EFM8BB21F16G.
I had included the download link for users who interested to download and use it. For Linux users, can just use WINE to run it by typing “wine BLHeliSuite.exe” in the terminal to load the application up.
Stay tune for the next topic on how to compile and make the firmware.
Downloads:
My Current Project – RnD on ESC – Day 1
So far I had finished assembling the parts but still awaiting for some major parts arrival to confirm all the schematic are working before migrating to the All-In-One board.
Front PCB: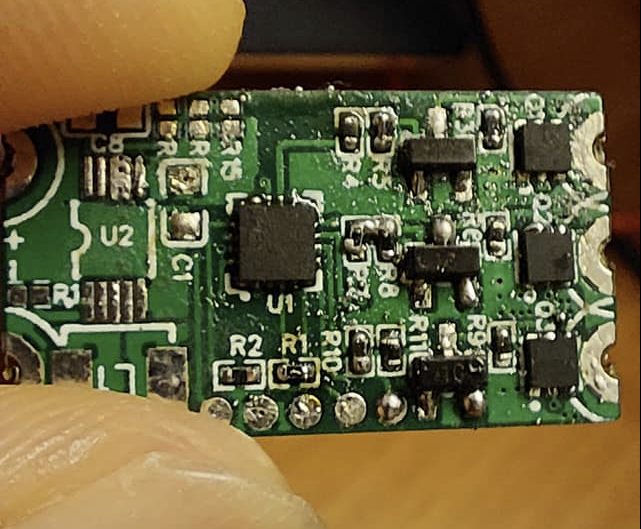
Back PCB: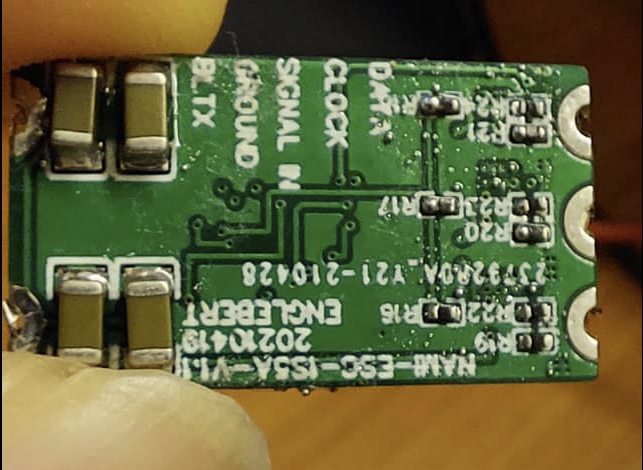
Is my first time working on 0402 size components. Still need to clean up those small dirty residuals from the paste. Also noticed that some of the parts still empty as I am still awaiting for the arrival of the components. That is the main buck-boost converter for this ESC project. As this ESC specification is as below:
i. Operation Voltage: 2.5v ~ 4.2v
ii. Operation Current: Maximum at 5A
iii. BLHELI firmware compatible
Now still on development and going to test it for the functionality once done. Will keep you all posted.